- Before you begin
- For Pros Only
- Follow all Codes
- Read the Manual before attempting
- Cut the Power
- If it's your first time:
- Step away
- Give us a call
- Get trained
- After you open the connection box
- Do you see the 2 open levers? - Use those ones
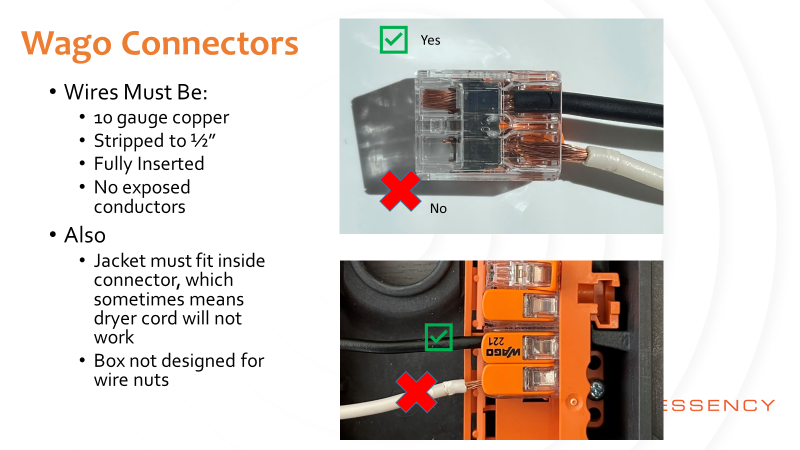
- Wire
- Copper Only
- Solid core is okay, but stranded or fine-stranded is better
- The more strands the merrier, for better contact and flexibility
- Use clean, 10 AWG wire only
- Lighter gauge wire = not enough current
- Heavier gauge = won't fit!
- Keep a close eye on dryer cord on a retrofit - the jacket is typically to thick to fit into the connector properly.
- Strip to 1/2"
- Connecting
- Remove bracket if necessary - gives you a bit more space & makes it easier to thread a strain relief nut, connect ground, etc...
- No excess wire or wire nuts inside the box!
- Do not attempt to join existing wire to new wire inside the heater's junction box. If existing wire is too short or the wrong gauge/type, it's best to run a new line. If you must use wire nuts, it must be done externally and according to local & national codes.
- Use strain relief whenever possible, especially if not in conduit
- Wire must go in straight, with no tension - tense wire may pop out.
- Push all the way to the back of the connector - you'll feel it bottom out.
- While holding wire to back of connector, push lever down. If it won't close, double-check that you have straight, clean, 10 AWG copper, stripped to 1/2", with no tension.
-
- After you've successfully closed the levers, give 'em a gentle tug to ensure good connection
- Incorrect wire or connection may cause no/bad conductivity, or overheating
- Don't forget ground wire
- Should look something like this below (factory-connected wiring removed for illustration)
- Note the following:
- Strain Relief
- No extra length of wire or wire nuts inside box
- No exposed copper
- Levers fully closed
-jpg.jpeg)
- Note the following:
- Look good?
- If so, close it up & flip the switch.
- Here's a slide from our training sessions for your reference...
- And a video from Wago themselves that might provide some additional insight...
- Don't forget to register & connect the unit. Call us with any questions!